A Spring Cleaning Checklist For Your Garden
Posted by Lee Benson on 17th Oct 2024
Did you know the tallest thistle weed is over 3 metres in height? If you’ve ever neglected your garden through an entire Australian spring, that probably doesn't come as such a surprise. Winter is well and truly over and we’re entering the season of growth. We’re left with two options at this point: get to our garden spring cleaning or let the weeds win.
If you’re opting for the first option, you can tackle it all in one or two sessions with some strong planning and the right tools. Today, we’ll help you with the first part, the planning, by sharing our spring cleaning checklist, perfect for preparing your Aussie backyard for this coming summer.

Your Ultimate Spring Cleaning Checklist
- Start with your fence maintenance
- Trim the hedges and trees
- Unearth the intruders
- The cleanup
- Give some TLC to your outdoor furniture
1. Start with your fence maintenance
To make your job more manageable, tackle the larger parts when you have the most motivation, and start from the edges with fence maintenance. Hopefully, there won't be any major issues with your fence, like collapsed panels. We recommend repairing your fence panels mid-season so you can avoid torrential spring rains but don’t find yourself working out in the hot summer heat. If you do need to replace your timber fence, there are thankfully a range of suitable alternatives available right here at Outback Fencing.
If you like the wooden style, PVC slat top fences offer an alternative rich in character that pays homage to traditional wooden fences, with a high-end style. It’s also resistant to warping, splitter and corrosion, making it a more durable option than wood. For a stylish finish that sacrifices nothing in the way of security and privacy, a Colorbond fence may be the perfect replacement.
And what if you already have a durable fence installed on your property? Then you’ll find that fence maintenance is actually pretty simple. For those with PVC fence panels, you can hose down the surfaces of the fence to remove dust and debris or use a brush for any stubborn pieces. Be sure to wipe down the top of the fence with a brush or damp sponge to keep it clean, as a build-up of water and dust can leave a lasting stain. Check for any rusting and organise those pieces to be replaced so that your fence stays effective in ensuring privacy and security.
2. Trim the hedges and trees
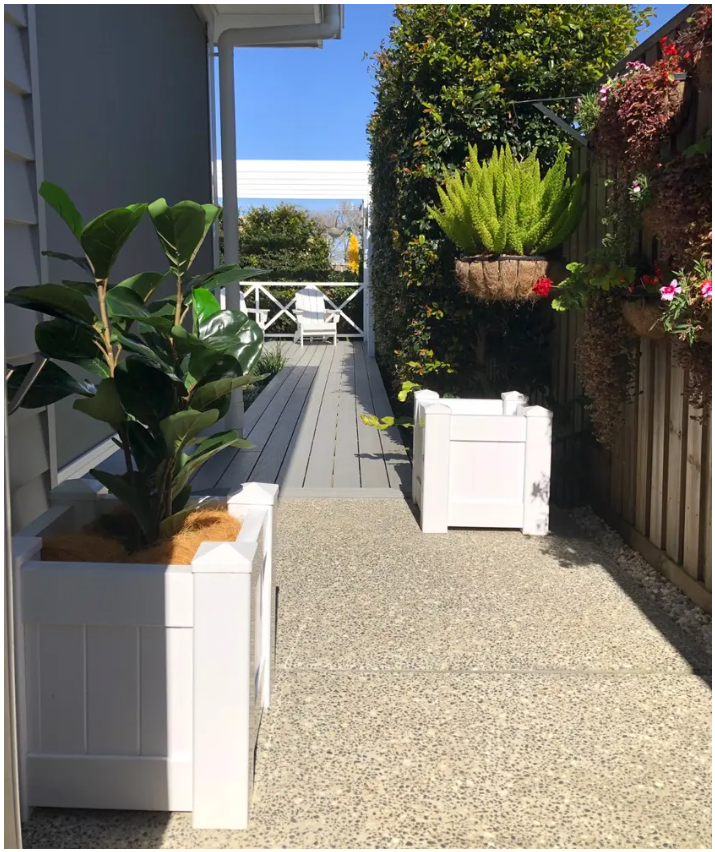
Whether you have lined your fence with a hedge, you’ve got a gorgeous Eucalyptus in the middle of your garden or some colourful agapanthus scattered throughout, the next step is to tidy up your plants. Trim any overhanging branches, especially if they’re impeding on neighbouring properties. Pro tip: our Hamptons Style planter boxes are a great solution for keeping your garden plants contained and controlled with minimal fuss. If you have any plants that are prone to growing faster than you can cut them back, try moving them from your garden beds to their very own planter box instead.
Spring is also the perfect time to give hedges a neat trim before they become unruly. This not only includes perimeter hedges but also any decorative hedges or shrubs that line your pool fencing. Not only do unruly hedges make it much harder to keep your pool area clean, but it can affect the quality of your pool water and thus cause safety hazards too.
Overgrown hedges and trees affect the integrity of your pool fence because kids can climb the vegetation and scale the fence, so trimming your nearby hedges and trees maintains the condition and cleanliness of your pool area but also keeps your backyard safe during the school holidays. Thankfully, we stock a range of kid-safe fences and pool fences here at Outback Fencing, such as perforated aluminium for better visibility.
3. Unearth the intruders
The right cleaning order makes your job far easier, so you don't have to sweep over and over again. So next, you can focus on the intricacies of your garden and the tidying-up processes. Start by getting your hands dirty and attending to the groundwork with weeding, pulling any weeds and dead plants out by their roots. Do this for the soil and garden areas, around the grass and in the pavers.
Getting the roots out of the weeds in the paving areas can get a little tricky, so weeding tools are a great idea. Depending on how big your garden is, a stool might help too. You don’t want to be crouching too long and hurt your back.
Once the weeds are out, consider applying a weed-killer chemical, although the results will be temporary. For a more thorough approach to combat weed growth, rework your space by installing Trex composite decking. It looks great year-round and will act as a ground cover to inhibit weed growth over the area it’s placed.
4. The cleanup
When you’re finished pulling and trimming all the unwanted vegetation in your garden, it’ll be time to start cleaning up all this plant debris. Start by raking all of the trimmings and weeds into big piles. Use reusable garden bags if possible so you can toss scraps directly into your green waste bin.
By now, you’ll be well on your way to a revitalised garden. A full sweep of the pavers, deck and concrete areas will bring it all together beautifully and sustain your garden design. Again, sweep into piles and dispose of the final dirt and debris.
You can then hose everything down. Everything should be in near tip-top shape at this point, but hosing down the pavers, soil and hedges will help remove the layers of dirt the broom couldn’t get and blend the torn-up soil back together. If your pavers have become grimy, use a pressure washer to remove them. When hosing the deck and pavers, use the broom again to give them a firm scrub and rinse when you’re finished. They’ll look good as new when they dry in the spring sun!
5. Give some TLC to your outdoor furniture
When budgeting for any garden design project, the costs of repairs or even replacements of outdoor furniture is naturally going to be a foremost consideration. Thankfully, most of the time it actually doesn’t take much to freshen up tired-looking outdoor furnishings.
For instance, if you have a fountain or water feature, now is a great time to clean or change the water filter. If mould or moss has built on any of the features, you can apply specific chemical treatments to these areas or rub them off with a damp cloth. In just a few short hours, your water feature should be looking as good as new!
And then there’s your outdoor patio furniture. For any furnishings that have been exposed to the elements, begin with a preliminary clean. Wipe down chairs and tables, and you might even want to run the cushions through the washing machine. And if any of the furniture is damaged, you can try to repair it with some handy work or replace it if need be, just to ensure you and your guests are safe and comfortable.
– –
With your Outback Fencing is only a call away. We’ll help you get the privacy and aesthetics right with a premium fencing service. For more information about any of the fencing solutions and other garden supplies we’ve outlined, simply get in touch and our experts on all things fencing will be happy to help you out with your next garden project.


